Showing posts with label Regency. Show all posts

Sunday, April 17, 2011

Regency Walking Party

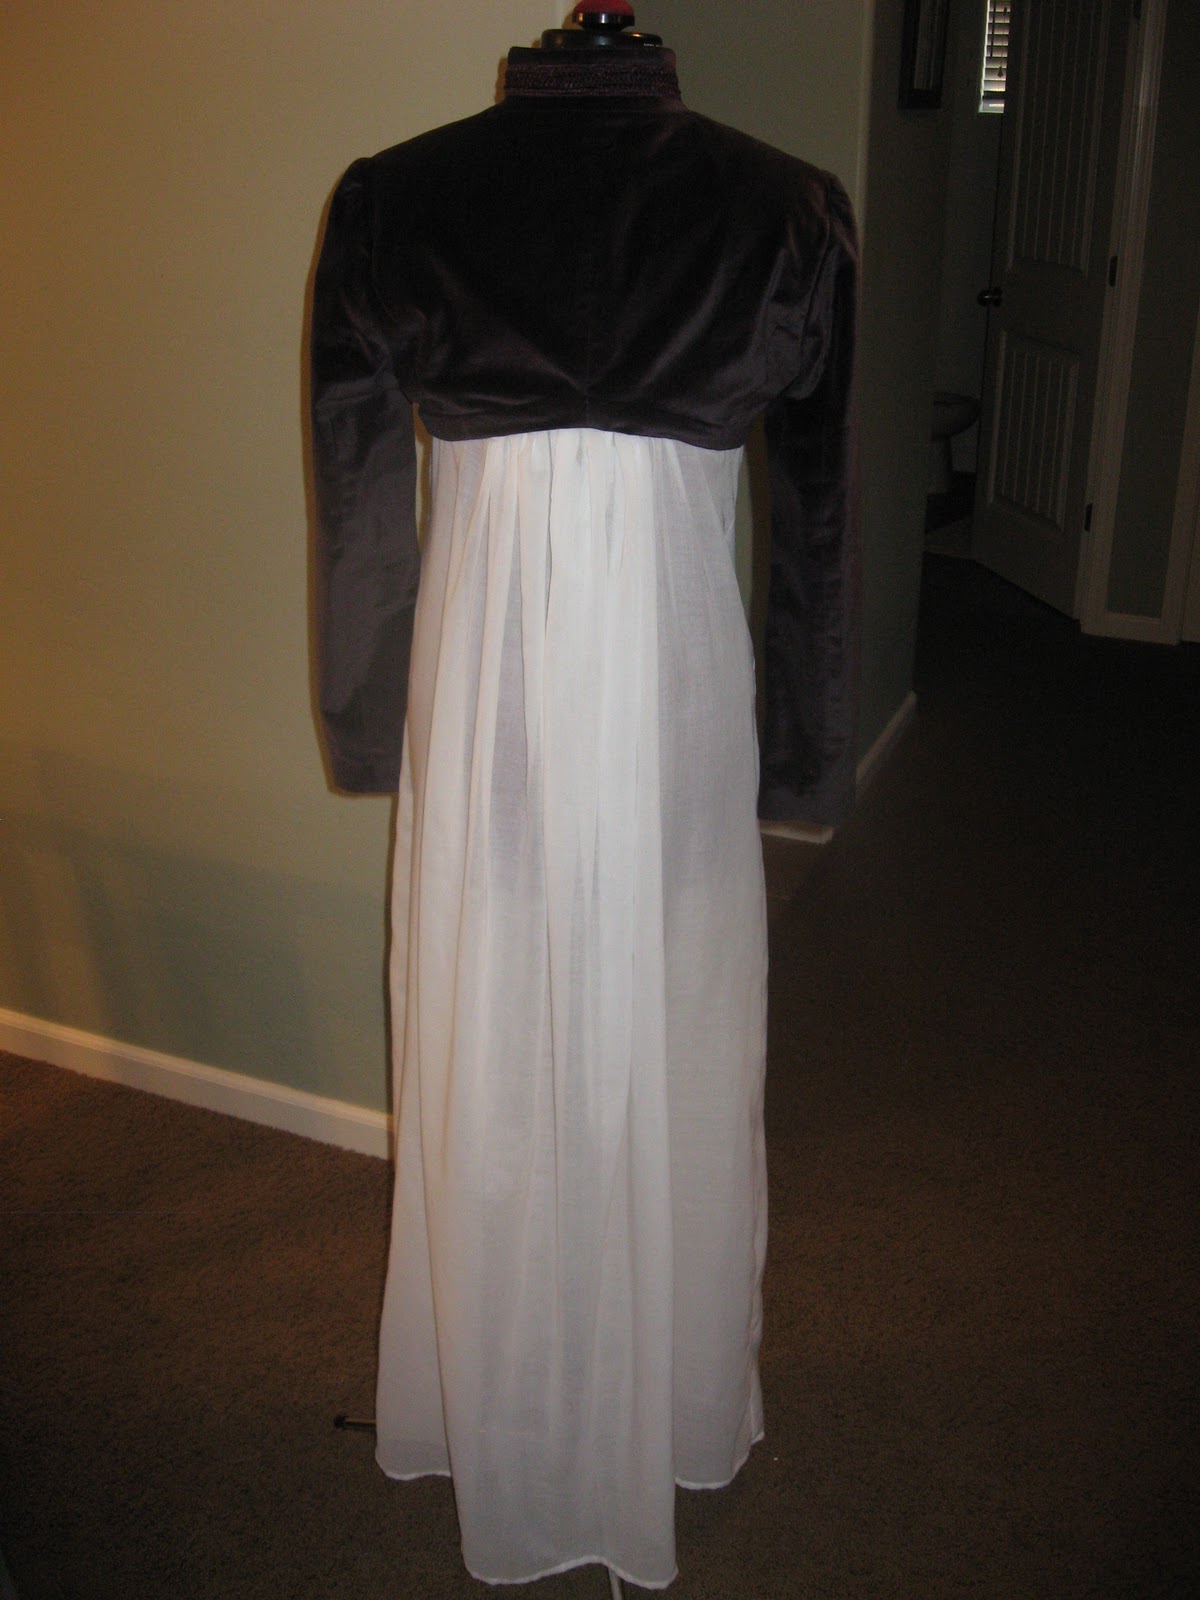
I finally had an occasion to wear my new Regency dress and purple Thrift Store Spencer (though it quickly became too warm for that).  As you can see above, the curve of the back actually turned out nicely. I was having loads of issues getting it to lay flat when pinning it, so I am pleased with this result. It think it shows off my bustle beautifully.


There are a lot of things I wish I had done differently with this dress even though I am still happy I made it. One thing is, the dress turned out way too short. I can't understand how that happened since my Regency Dress 1.0 was extremely long and I used the same pattern. Oh well... the shortness actually came in handy for the walking party, since the other girls were either dragging their hems through the mud, or eventually became tired of holding up their gowns.

The table spread reminded me of the Mad Hatter's tea party.

Another thing I messed up was that the bust of the dress was too high. It kept riding up and slicing my boobs a bit. Heather says if I have the right foundation garments this might solve the problem. Also, Jennifer gave me some pointers of how to modify my bodiced petticoat slightly to push my boobs together more. So, hopefully I can make this dress work.. eventually.

Fun picnicking blankets!

The picnic was so much fun, as we had a lot of food to share and loads of wonderful conversation. I can't wait to have another event like this! There were many beautiful dresses to look at and many looky-loos wandering our way. Hopefully PERC Fresno will grow over time with more period costume fans in attendance. 

The whole group in assembly at the Japanese Gardens in Fresno.

More pretty costumes!

Saturday, February 26, 2011

How to make a thrift store Regency Spencer: Part 4

I finished my Spencer! I'm pretty pleased with it, and hope to post pics of my entire Regency ensemble someday.  Here's what the finished dress looks like:


Now, back to the tutorial:

1) After rolling the waistband to the thickness you want it (mine was only an inch, since I didn't have more usable fabric to work with), handsew the hooks where you want them. This will keep the coat closed and close to your body.

2) Handsew or machine stitch waistband to the inside of the coat.  Try to be even, though I don't always have much success with that.  I handsewed mine... while watching 4 hours of Jane Eyre!

2) Check the fit to see if there's any wierdness going on.  

This pic was taken with some pins still in it, so it's still a little bulgey,
and I might need to add another hook to close up that little gap in the front.

  3) Then, take a long car ride to Tulare (45 minutes away) while handsewing the lining in place.  


4) Then you're done! Try it all on!

My waistband doesn't seem to curve up as high in the back as I wanted, but I think it still shows off my train nicely. 


By the way, I finally figured out that pesky buttonholer!  I had to go to the school I work at to get the sewing teacher to help me. My machine's buttonholer doesn't seem to want to work on this thin fabric.
Practice makes perfect!
Here's the button design I planned on using, however, I think it sticks out too far with my Spencer over it. So, I might cover my own buttons.  However, I'm actually feeling a bit upset about my Regency attire right now, since the event I planned on wearing it to was cancelled. So I might not come back to this for awhile.

Edit: The dress and Spencer are done!  See the completed product here.

Wednesday, February 23, 2011

How to make a thrift store Regency Spencer: Part 3

Welcome to Dr. Frankenstein's Laboratory.
This has been the biggest piecing together of scrap material since the patchwork skirts of the 40s.
Sewing can be frustrating sometimes. Sometimes I'm not really appreciative of the lessons I've learned while sewing. Today's lesson was that velvet apparently has a top and a bottom. If you turn a piece around – because you need to use a scrap as efficiently as possible – it will look like the photo below where both middle pieces of the waistband are a helluva lot darker than the rest of the coat. I realized this AFTER I had sewed it down, of course. I undid the whole thing and then sewed it wrong AGAIN.  Six hours later, I've posted here what I've learned.

1) After pinning down the band (making sure to check that the velvet or grain of fabric is running the same way thoughout), sew the top of the waistband with right sides together.


2) Flip the waistband down and then check how much you want to hem the piece. I wanted my waistband to be 1 inch wide (mostly out of necessity since the pockets the coat previously had inhibited the amount of fabric I could get).

3) Trim the excess material underneath the waistband.


4) Pin the waistband to the width you want.

5) Go ahead and cut off the miles of lining now, leaving about an inch to hem nicely inside the spencer!  :-)     (Thank God)


6) Check out the pinning job.  I will need to mess with the evenness of the width, but I'm too tired right now.

Da' Front.

Der bach.  ZZzzzZZZzzzzz.
My entire dining room now has overdosed on velvet pills which cover every usable and non-usable surface:

In fact, the pills also now cover ME. Tonight, I will dream of ants crawling all over me.


Dr. Frankenstein – OUT –.

Tuesday, February 22, 2011

How to make a thrift store Regency Spencer: Part 2

So, you'll need to decide where to chop your coat, which could be between the range of right below the bust to a little above the waist. I chose for right below the bust since my coat's a big mass of purple as it is.  

1) While wearing the coat, pin where you want the top of your hem to start. I am making a waistband on mine, so the top pin is the top of the waistband, and the lowest pins are the bottom of the band (and also where I am going to be cutting). In the back I marked where my bustle starts on my dress and then added some pins in a curved manner.

2. Before cutting, you may want to take apart the lining (only up to where you will be cutting... leave the top part in tact so you don't add more work for yourself!). This way you can use it to cover up the waistband seam allowances later.


3) Cut the coat along your bottom pins, being careful not to cut the lining. See? Now I have a WHOLE LOT of extra lining that I can use for... I don't really know, actually... Just figured it might come in handy for finishing the inside.  For now I'll just safety pin the miles of lining somewhere on the inside so I don't have to look at it.


4) Now your coat looks something like this... a little more Regency but not quite there yet.


5) Now, as you can see above, the coat hangs very squarely. That's not so good for the fitted look of Regency. So you'll need to add some extra "dartage" so the waistband actually goes somewhere close to your skin.  I "triangled" the existing under-the-sleeve seams and existing bust dart seams but pinning first and then, well, um, sewing. Isn't making up words fun?

Close up of my under-the-sleeve seam (and increased dart)...

...And far-away shot!
6) And here's the part I had the panic attack about.  Cutting the waistband. If you mess his part up there is really not too much extra fabric to help repair the damage. Not to scare you or anything...

So, I cut out the pockets first with my seam ripper, and then cut about a two inch strip of fabric, following the curve I already added for the back.


7) Then pin the waistband (right sides together) to your coat. It will take some repositioning, but for right now I just wanted to see what it looked like to check if I was on the right track.  

I knew there would be a problem in matching the seams, but I was hoping it wouldn't be terribly noticeable. It kind of is:


Here is a close up view where my left Spock finger is near the top left seam and my right Spock finger is along the lower right seam. They miss each other by about a centimeter. Ugh. I'm too tired to think about what to do with that right now.


8) After pinning all the way around, you'll need to check if everything is level. Mine isn't, especially in the front, so I'll need to fix that... tomorrow.  In the pictures below everything's a little bunchy because I still have the miles of lining tucked underneath the coat and then hand-tucked the bottom hem of the waistband under to get an idea of what it'd look like, so don't think these are final shots, by any means.

Here's the pretty back!  I might raise it up more.
Here's the front with my fingers trying to hold in all the thick fabric underneath. I will DEFINITELY be raising this band up higher... and make it even... tomorrow.

Planning my Spencer

So, I'm having a hard time deciding which features I want to add to my Spencer.  I want it to look as much like Lizzie's as possible, but know I'll have to make a few sacrifices.


  1. The first sacrifice has already been made: My Spencer is purple velvet. Not black whatever-her-fabric-is. 


2. The second decision is whether or not to make the front open enough to show my dress.

I really want to do this because of the pretty gathering I've done across the front of my dress, but I don't see how, since there is existing cording all along the edge of my jacket which would be hard to remove and then recreate.


3. I also need to figure out how to do the military detailing Lizzie has on the front of her coat. I've been trying to figure out if this has a different name than "Frog" but haven't had much luck in that area.  
Here you can see the three-dimensional trim on her bodice front.
My coat already has a bit of military-design to it, but it's just done with a simple stitching and Heather suggested I just use a braided cord to get the look I want. Now, even though I really want Lizzie's look, I'm also a bit sad about covering up this cool already-in-existance thing about my coat. However, I think I can be happy knowing where to PUT the braid without having to measure and remeasure. Now, I just have to find braid like this:

4)  Once I figure out the braid thing, I need to decide about removing the hooks and eyes or not. The third fastner was already missing when I bought the coat, but I could just move up one from the cut-off bottom to replace it. Lizzie also has a button-closed Spencer which is nice too:


 5) Then there is the matter about the back. What in the world to do here? I can't seem to find a picture of Lizzie's Spencer back, so that causes a few problems.  So here are my options:

Pleating with button detailing... or with a band divider.


Fish Tail... a little odd, but would probably look better if larger in design.

Then there is the curved back. I think I like this one the best for my design because it would show off my gorgeous gathered bustle in the back.
(Ignore the fact that there are no undergarments or button closures in this picture!)

I just thought of something: When I do finally get around to figuring out the buttonholer and I attach my pearl buttons... won't they stick out funny under my Spencer?  Uh-oh!


6) One final thing... I like the detailing the Bennet girls always have on their Spencer sleeves (as in the yellow coat photo). It's a little strap and a button; I wonder if I should do something like that. It would be awesome if I'll have enough of that purple braid from the weird back piece I removed, but I doubt it.