
As I mentioned in the previous post: Part 1: Drafting Rey's Resistance Jacket, the second I saw The Force Awakens last December, I knew I must have Rey's Resistance jacket for myself!
 |
| My daughter Eowyn with our newly delivered shipment! |
I know the fabric color is a bit light compared to the screen version but it's currently impossible to find the correct fabric online.
I also didn't want to ruin this beautiful herringbone fabric by dyeing it a darker shade. I decided to leave it as is and go with a "Lighter Rey" look! Enjoy!
Cutting out the pieces:

Layout of the Princess Seams:


Next, I needed to topstitch the princess seams leaving 1/4" channel/gap for an embroidered ladder stitching detail. In order to do this, I grabbed some 1/4" cording and pinned my fabric on either side of it. After I topstitched 1/8" away from the cord on each side, I had this glorious reveal: Perfectly spaced stitching!
 |
| Let's roll that beautiful seam-channel footage! |
 |
| Drool... |
I followed these instructions on how to embroider the ladder stitch on Rey's neck and back princess seams. (This was much easier than the closed blanket stitching I had to do on the jacket edges and gauntlets, I'll-tell-you-what.) I bought many different shades of gray on embroidery floss to match my light gray fabric, but finally settled on DMC #648 (Beaver Gray Light) to match my light gray fabric. Yes, Rey’s jacket is darker than mine but I didn’t feel comfortable dyeing (and DRYING) wool.
 |
| Finished ladder stitching: Each stitch was placed 1/4" apart. |
Shoulder pads of evilness:
 |
| This is what the inside of the shoulder pads look like. |
The top layer is the wool, followed by two high loft synthetic batting pieces and one sturdy natural cotton batting layer. The bottom layer is the lining.
I was trying to strike a balance between puffy and... not. (In retrospect, I don't really like how the low loft natural cotton made my lining layer a bit choppy rather than smooth and puffy. If I had go do this again I may have still included it, but perhaps it would have been better sandwiched between the two synthetic pieces.)
Before stitching it together I had to place the wool so the right side of the wool was the bottom layer and was actually facing the right side of the lining fabric. This is so when you flip it right side out, everything is where it should be. Below you can see the correct order in which to sew the pieces together. On the long edge I sewed only 2-3 inches from the top and from the bottom so there was a big enough gap to flip everything right side out.
 |
| Be sure to clip your curves before flipping them right side out! |
I made a cool tracing pattern to help me draw in the shoulder rows. See my Part 1 pattern drafting page for a pic that includes dimensions for each row.

 |
| My dog has since destroyed this cool template. :-/ |
I then hand-basted the stitches with red thread so I could then top stitch them with my sewing machine. Unfortunately that red thread was a pain in the butt to take out due to my sewing needle splitting the red stitches!
| ||
Mistakes were made:
|

 Okay, what really happened with my shoulder pads was my invisible ink disappeared by the time I wanted to sew the basting stitches. That’s an easy fix… just redraw the lines using the template, right? Well, no… the whole shoulder pad seemed to be a different shape once I flipped the thing right side out (dang puffiness!) ... so my template didn't work to redraw the stitching lines.
In order to start over, I had to use pins to space out my new rows. It was frustrating to duplicate work, but were I to make these shoulder pads again, I would have used this pin method instead of the template method. I also would have WAITED to topstitch the rows until the shoulder pads were already attached to the jacket. Yes, it's a pain to sew the topstitching once it's attached but I really think it would have prevented all the errors I encountered with my project: disappearing ink, having to take out all the stitching to extend the shoulder pad over my shoulders more (so it didn't look like I was wearing a wife-beater), shoulder pads fighting the curve of my shoulder, etc. Okay, let’s move on.
Fraying the garment:
Before I embroidered the front edges of the open-front jacket, I carefully pulled out a few fabric strands and then cut them off. I then doused the edge in Fray Check to seal it before embroidering with a closed blanket stitch.

 |
| During fraying |
For the bottom edge of the garment, I added a bit of substance to the frayed wool edge by also fraying the lining. I really liked the effect of this and I imagine the original jacket may have an extra layer of more frayed wool to give it the bulk it seems to have in reference pics.

The lining:
1. Wool is itchy
2. There are lots of seams on this thing… and they aren’t going to look pretty exposed on the interior.
3. It’s realistic. What’s the point of this jacket? Certainty Rey is not trying to make a fashion statement.
4. It adds a nice weight to the garment. (See example "before" pic below)
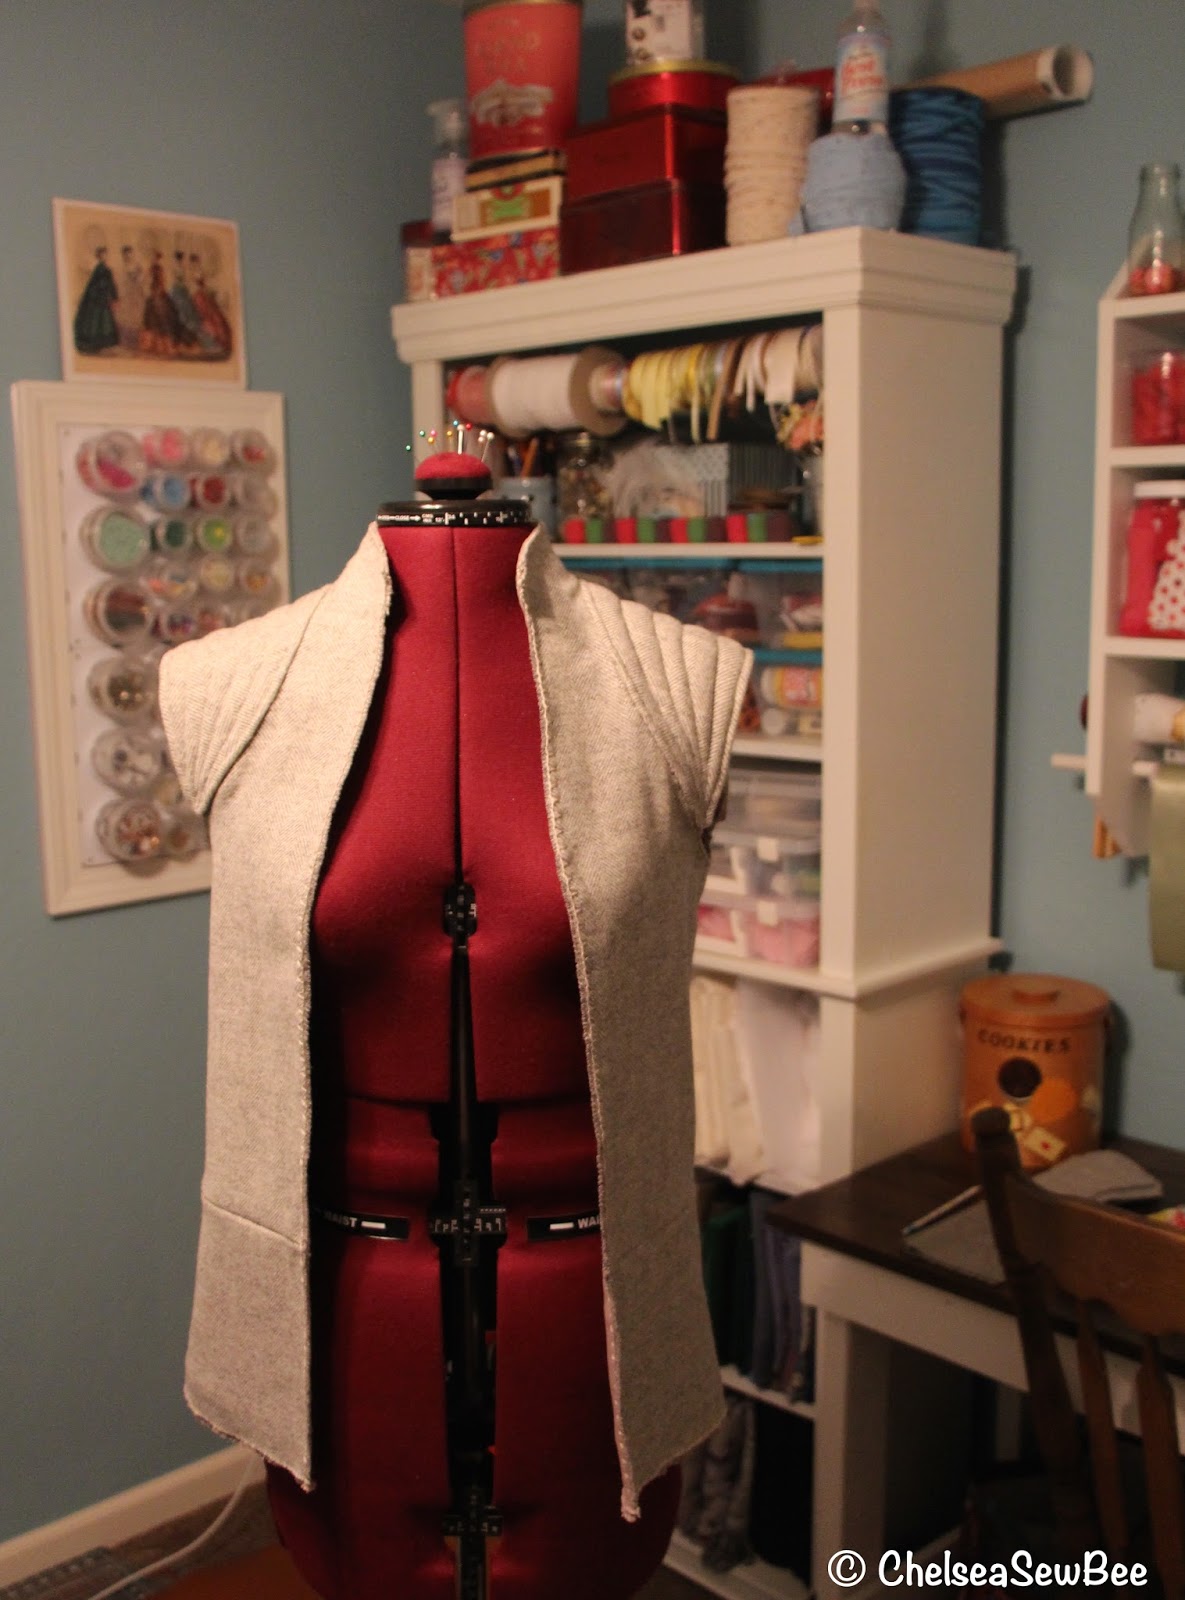
Below is a pic showing how flimsy the jacket is without a lining. You could definitely reinforce the collar with interfacing (which I did) but it would be visible without something to cover it. Perhaps a wool self-lining would be sufficient but no one really wants wool on their neck... don't torture yourself.
 |
Before the lining!
|
Below is what the interior looked like before I sewed the rest of the lining in. As you can see, I designed the jacket so the shoulder pad stitching detail would be visible form the interior of the garment (rather than extend the wool to cover this detail).
 |
Ugly seams everywhere!
|
I whipstitched the shoulder pads to the wool interior and then did so again on the wool exterior of the garment. This way I could control how puffy the edges of the shoulder pads were because without tacking them down they were a little unruly. I worked and reworked where the pads meet the outside of the jacket as it's a balance between wanting them to be 3D but not too raised off the fabric.
Unfortunately, the shoulder pads got a bit bunchy on the inside and so they didn't come out as beautiful as I intended. However, I'm still thrilled with the added weight (and softness) of the lining as a whole. Since I had to deal with the crazy look of having frayed edges all around the exterior of this jacket, I decided I wouldn't deal with an ugly interior as well!
Unfortunately, the shoulder pads got a bit bunchy on the inside and so they didn't come out as beautiful as I intended. However, I'm still thrilled with the added weight (and softness) of the lining as a whole. Since I had to deal with the crazy look of having frayed edges all around the exterior of this jacket, I decided I wouldn't deal with an ugly interior as well!

I knew I wanted the interior to be sexy. That means less seams and choosing a fabric soft as silk! I purchased this suede-like fabric from Joann Fabrics and I love love love it. To plan the lining, I sewed together my front mockup pieces and then cut the lining as one to eliminate the connecting seam.
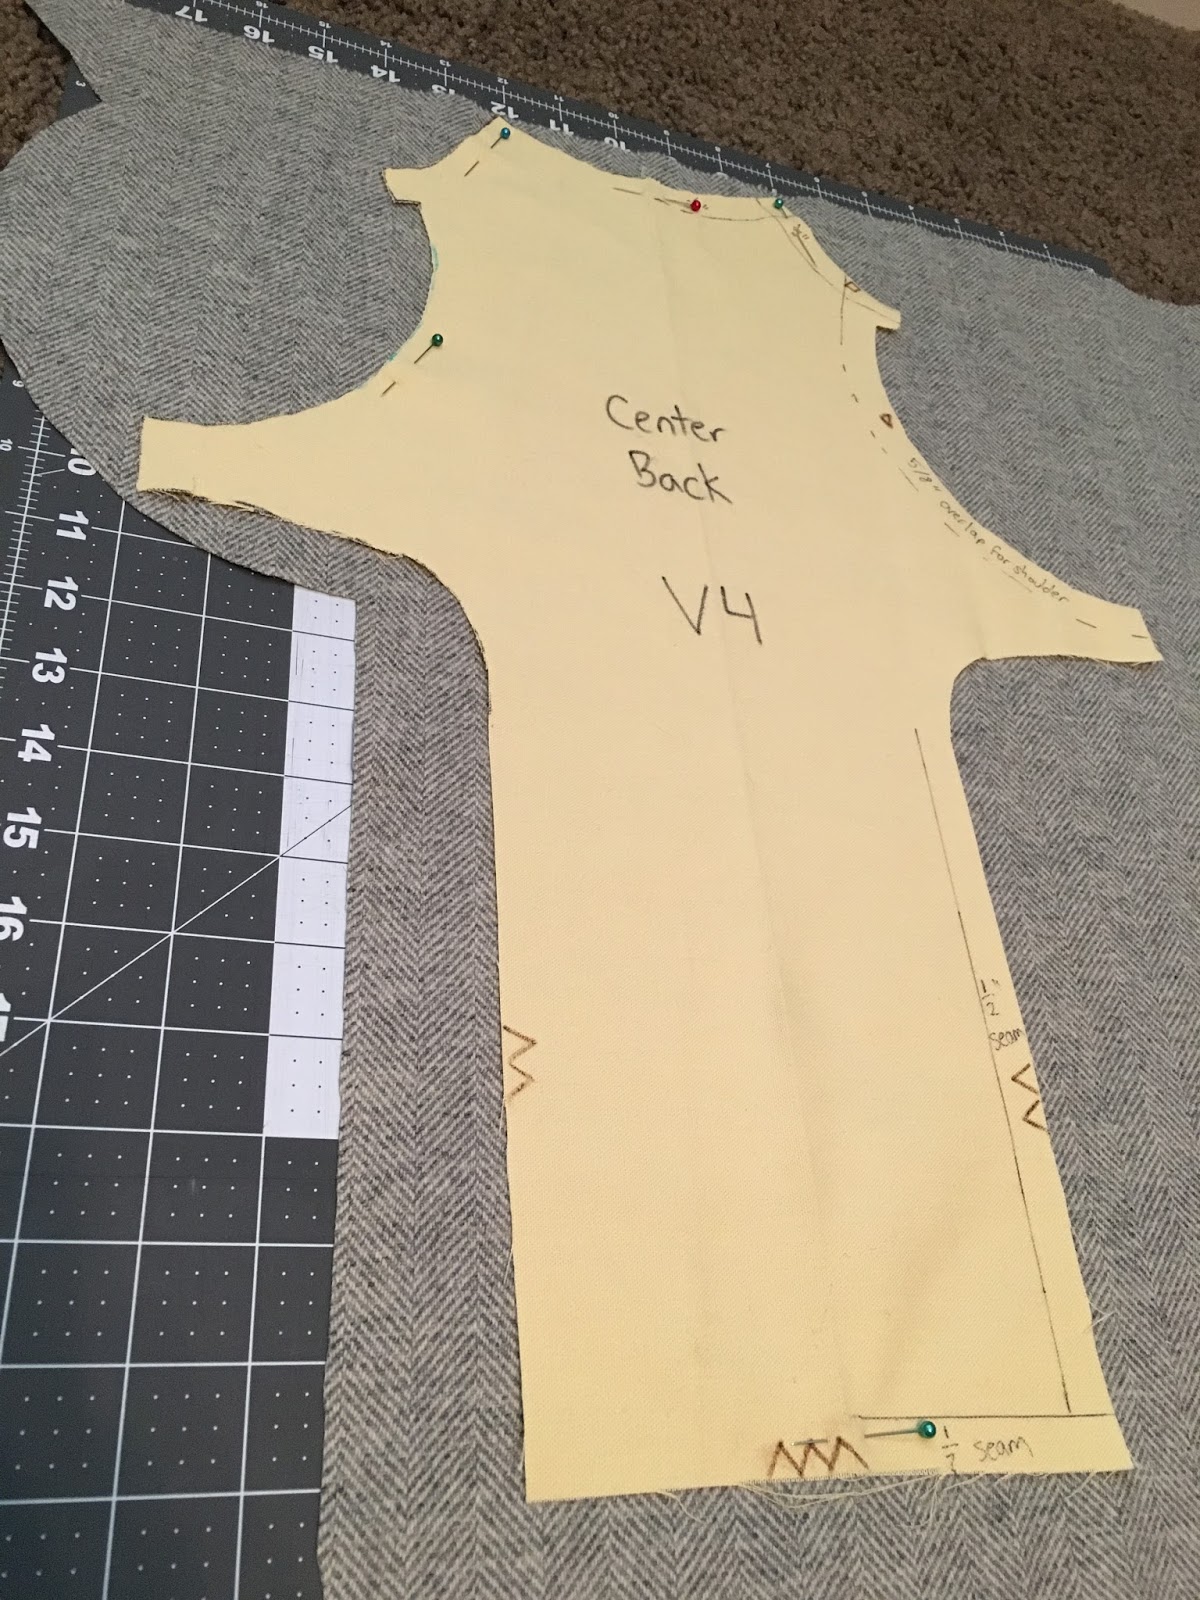
Hopefully the ruler helps you see a bit of the measurements of my garment. I have a very long torso which I think results in some problems trying to recreate Rey's jacket for my height. (I’m extremely nervous about sewing her long tunic… I mean, that thing is going to look giant with my extra 3 inches of torso.)

The lining process was a little trickier for the back. I had to actually sew together the mockup's princess seam pieces... taking into account the 1/4" ladder stitch gap. This probably amounted it a fair degree of sizing error, but it did its job.
The entire yellow piece seen here was sewn and/or pinned together and then cut out as one large piece from the lining.
I wish I would have accounted for more than 1/2 inch of seam allowance for the lining above and below the pattern pieces as things shifted around and I was a little short in some places. Better to have more than not enough!

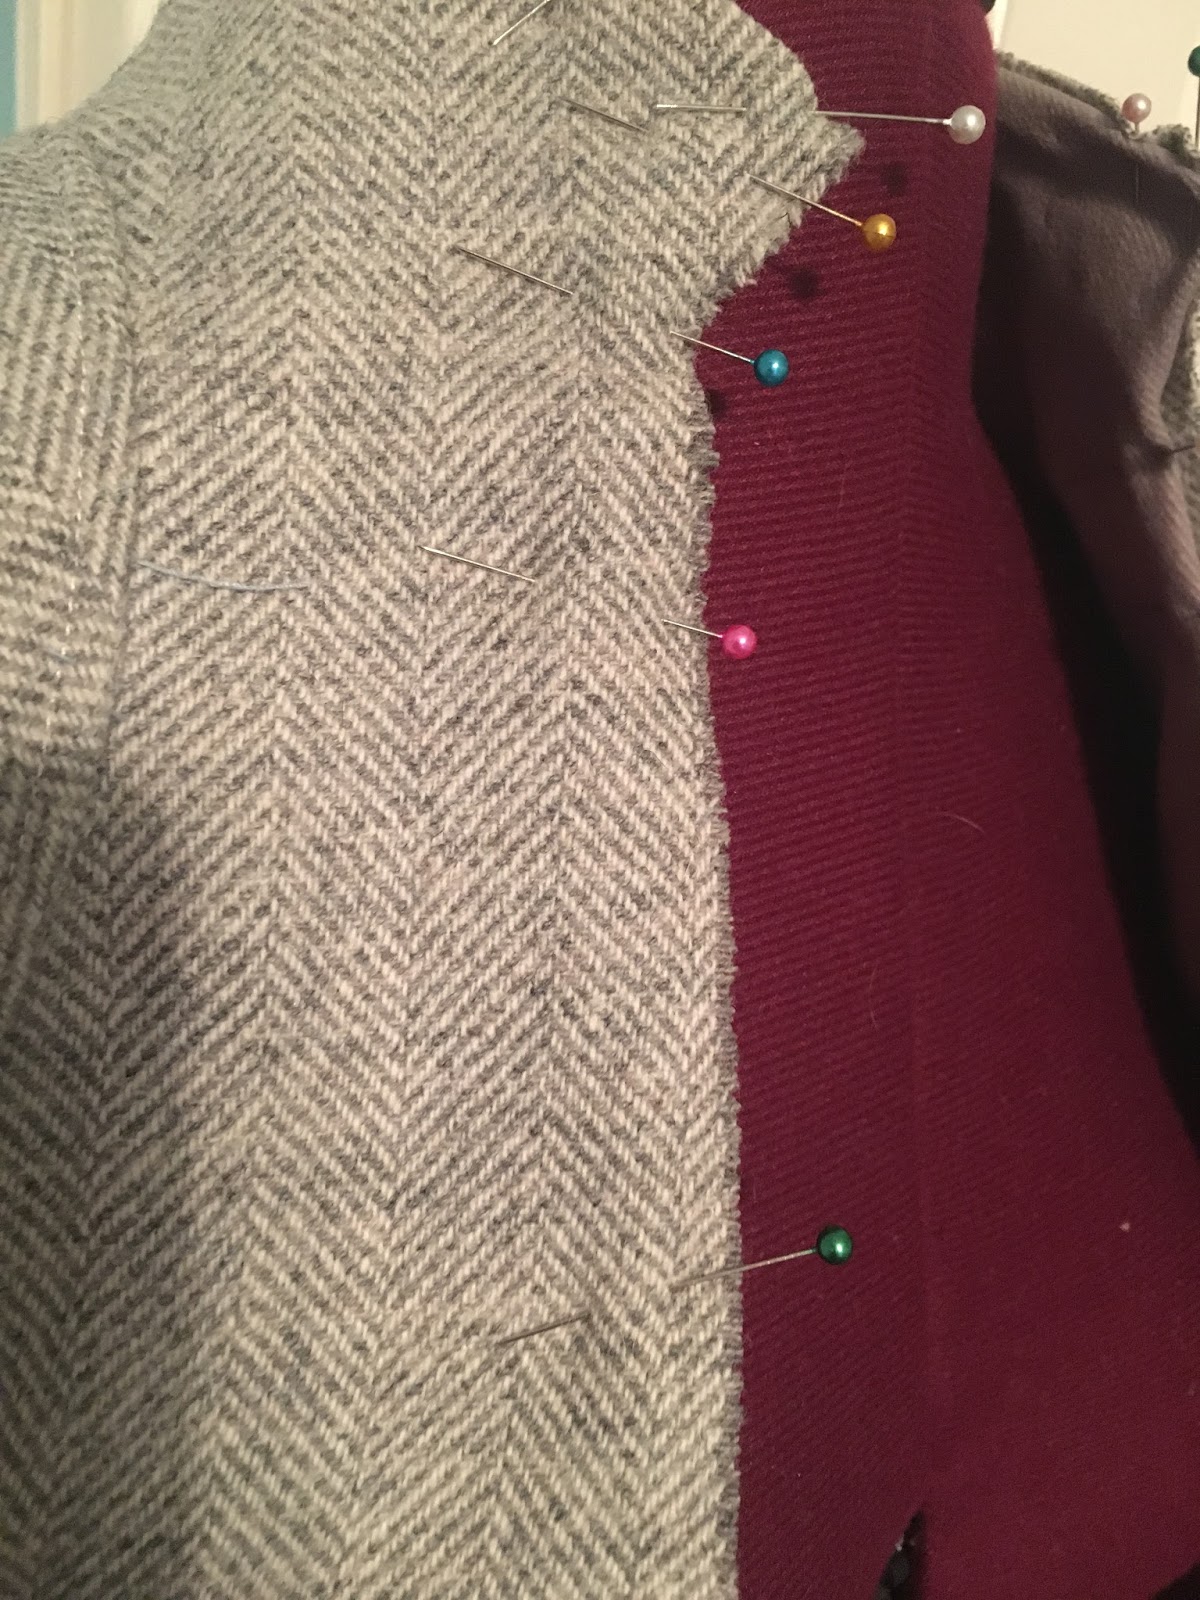
You can see here that I whipstitched the shoulder pads again once I got the rest of the lining in place; this way the shoulder pads and the jacket lining would be connected. A bit of overkill, you could say: I’m prepared for a Bantha to try to rip off my shoulder pads.
You can also see the thick white non-fusible interfacing I slipped in to add strength to the collar. I was afraid the bottom ending point of the interfacing would be noticeable as a ridge from the outside of the garment so I chose not to use an iron-on facing. In this pic the interfacing is moving around a bit, but you get the idea!
Since the lining is essentially held in pace by the embroidery, I had to hand-baste the lining in along all seams. This way the lining was completely flush with the wool all the way to the edges and all the seams pointed in the directions I intended them to. In the pic that showed the interior of the garment prior to adding a lining you could see I pressed all interior seams open EXCEPT for the back peplum (due to all the added bulk of the princess seams/ladder stitching channel).


I left the bottom of the lining unfinished (and purposefully frayed) in order to add some bulk to the frayed wool. However, since I cut the bottom of the lining in the car on a road trip, I may have miscalculated the length of the wool and had to add a second layer of frayed lining to actually meet the edge of the wool. Don’t knock it though, I absolutely love the look of it! See the two rows of frayed lining in the pic below? Such a cool effect, I think. I mean, if Rey sewed her Resistance bag *nervous tick* INSIDE OUT (with fraying EVERYWHERE *nervous tick*) she couldn’t be the best seamstress in the world, could she?


Check out how structured the jacket is without being on a dress form! It's a solid item, to be sure.
After basting along all seams then folding over and pinning the lining to the front and top edges of the jacket, I was ready to embroider it into what you see pictured here!
After basting along all seams then folding over and pinning the lining to the front and top edges of the jacket, I was ready to embroider it into what you see pictured here!
Embroidery:
Rey's jacket uses an embroidered closed-blanket stitch around the front edges and collar. I used this tutorial to help me learn how to do this. Luckily I had practiced on Rey's gauntlets first so I got the hang of it, but embroidery is still not my favorite thing. The stitch is supposed to look the same on both sides of the garment... but it’s somehow missing the top embroidered bar on my lining interior. I'm sure I'm doing something wrong, but all I got are "V" shaped stitches on the inside. Nevertheless I like it!


I left the collar unfinished even though it appears that it would be more screen-accurate to have a properly finished edge (possibly to hide the interfacing). Unfortunately I had a few mess-ups that resulted in my collar being too low and I didn't want to sacrifice any more height by folding over the edge. Therefore, I did not fray the collar before embroidering it.


And now... the finished garment:


Next up: Part 3: Sewing Rey’s Resistance Bag
(preview pics below!)


Hi could you email measurements and instructions to me I'm dying for this vest!!!
ReplyDeleteCould you please email me this pattern measurements and all. Ive been searching for this pattern and I cannot find one with measurements. I'm dying for this vest!!! Please help!
ReplyDelete