


One belt she wears has the belt flattening out from the TOP
rather than the bottom. However, there are many more reference pics available
showing the flattened section on the bottom.

One pic shows Rey with a very skinny top belt, though many more seem larger on the top. The same pic also depicts the belt with a light color. But many more show the opposite.

Therefore, I decided upon using the widely available Division6 pattern online as a reference point and then made many modifications to try to be as accurate as I could to most the available online images.
Modifications I made to the available Division6 pattern:
(I followed quite a few of the recommendations in EmeraldB's amazing tutorial) |
| Division6's original pattern |
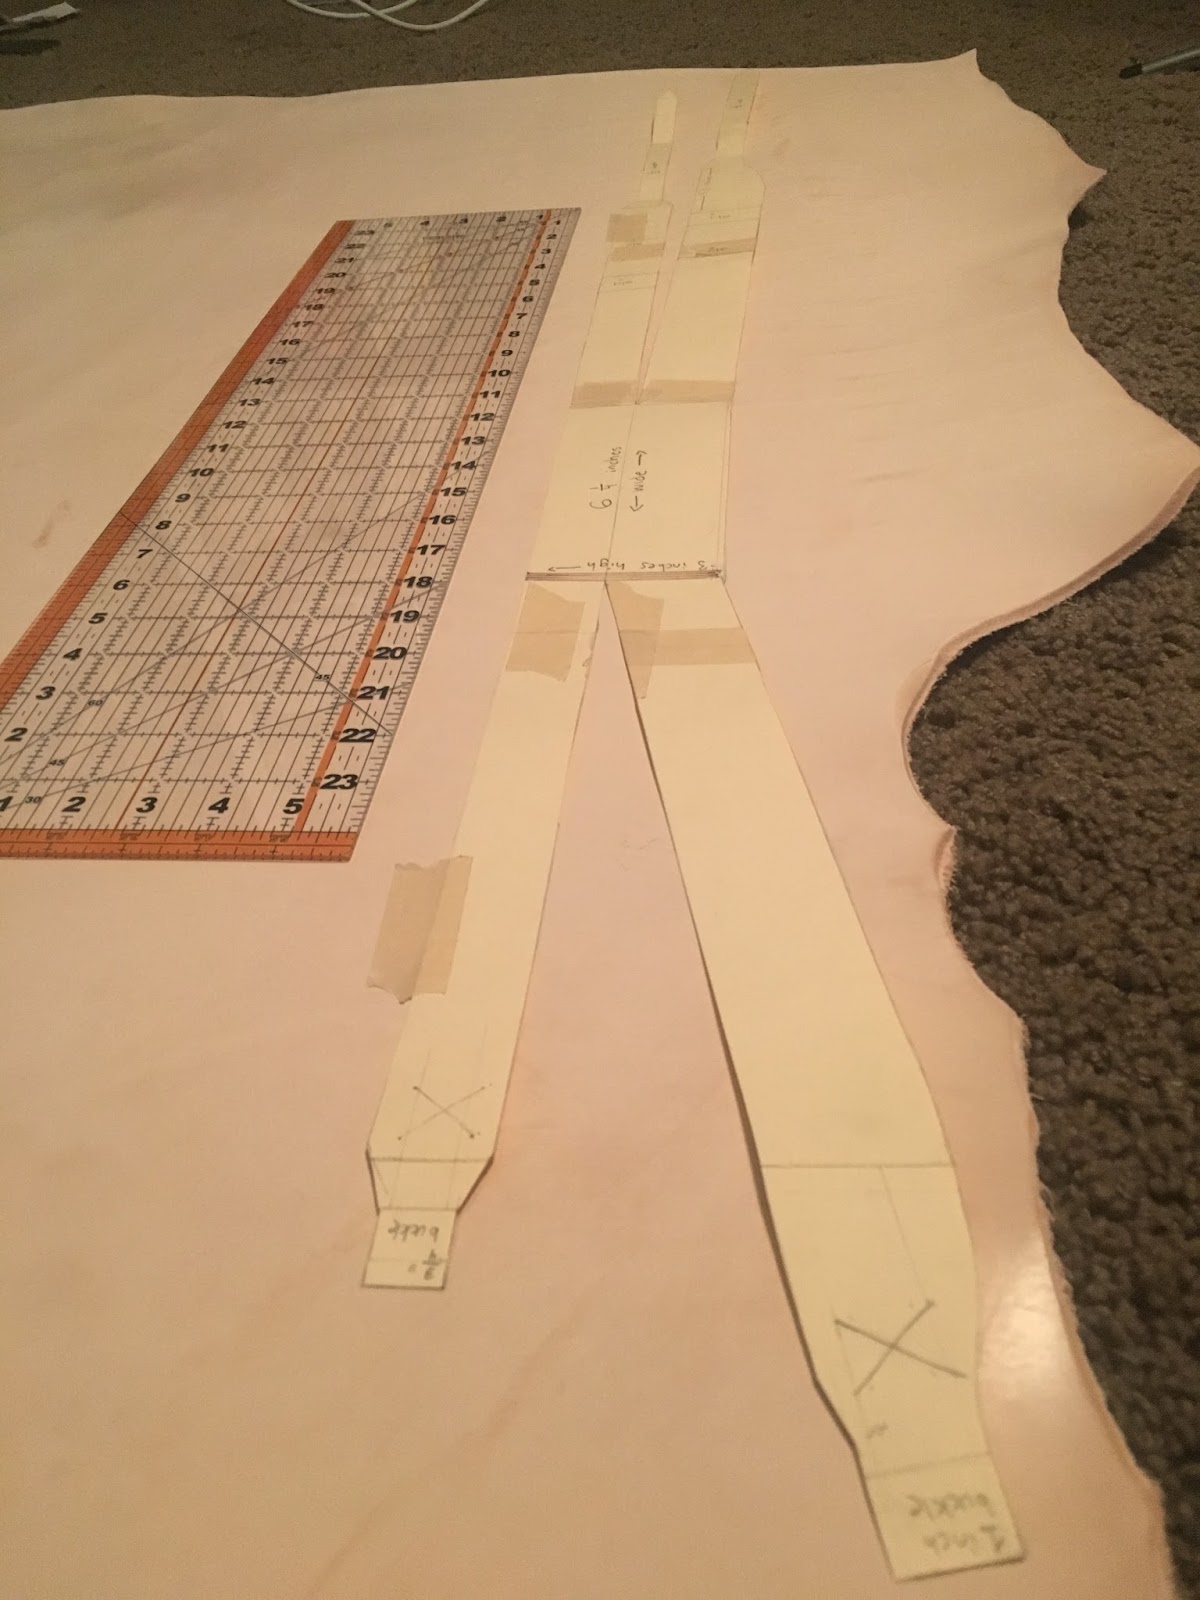
- I adjusted the thick portion of the belt to 6 inches across (before it splits) and 3 inches high.
- I adjusted the top belt to 1 ¼ inches high.
- On the top belt I used ¾ inch square buckles (2 required)
- I adjusted the bottom belt to 1 ¾ inches high.
- On the bottom belt I used 1 inch square buckles (2 required)
Drafting my pattern:
In drafting Rey’s belt to fit my body, I had to cut and
expand and retract so many times that I learned a few things:
My body type is much different than the pattern available
online. My hips are a good 10 inches wider than my waist measurement, so it
took many tries for me to figure out where all those inches would need to go on
my pattern. The best guidance I can offer is that the belt buckles are
basically meant to hit the middle of your side. Adjust things accordingly.
The reason Rey’s belt has certain features is so it fits the
actress’ body perfectly. If you are investing a chunk of change into your own
belt, you should use the same principles to ensure your belt fits you like a
glove, namely:
Make sure the split belt does NOT bend away from your body
at any point. If it does, the fit is not correct and you should splice your
pattern piece and add or subtract pieces to help it lay flat.
The REASON the belt flattens out on the bottom is so it can:
a) straighten the belt out enough so the front of the belt
meets the back of the belt in a straight line, not an angled one
b) so the belt can lay flat against your hip, NOT bend away
from it
If you are buying leather that is already dyed (like a belt
or a finished/dyed piece from a leather store), you should not expect to be
able to dye the leather to a darker shade. Leather dyes are only effective on
untanned leather. They will come out blotchy on preexisting dyed leather.
I made the mistake of buying a finished piece of leather
first, thinking I could darken/weather it somehow. I was wrong and realized I
should have just bought the less expensive piece of untanned leather instead.
Luckily Tandy Leather let me exchange my piece even though I scuffed it up a
bit transporting the original piece home. They have an awesome 100% guarantee return policy!

Materials and Supplies:
- $9.99 Eco-Flo Gel Antique in Dark Brown (though I probably would have bought Medium Brown instead) from Tandy Leather
- $7.99 Eco-Flo Super Shene from Tandy Leather
- $35.99 (sale) Craftsman single Veg-Tan shoulder in 7-9oz (though I wish I would have bought the 6-7oz one instead) from Tandy Leather
- $2.49 Darice Designer Jewelry Hemp Cord from Joann Fabrics
- $7.99 Barge All Purpose Contact Cement from Hobby Lobby
- Wide Clover Chibi Embroidery Needles for threading the hemp cord through the leather
- A Sewing Awl

 Cutting the Raw Leather:
Cutting out my pattern with an X-acto knife was a bit challenging, resulting in me making two belts (after I got a little carried away with slicing too far on the first one).
I used my plastic ruler to help guide my knife and put some cardboard underneath as I sliced.
The only fun part of cutting out this thick 7/9 oz leather was seeing it removed from its cut-out! Other than that it was really not enjoyable for me.
 I did a few things to smooth the rough cut edges.
First I simply sanded down the rough bits with whatever sandpaper I had laying around.
Then I attempted to "Burnish" the edges by wetting a cloth and rubbing it across the edges to smooth them. I liked the resulting slicking effect immensely!
Finishing the back side of the belt:

First I marked the belt locations with a pencil.
Then I used my X-acto knife to cut out the channels where the belt would have loop back through.
 Then I used a seam ripper to poke holes where I wanted the decorative twine X to go.
I used an awl to make the holes bigger, but I really wish I had a leather punch! My thick leather was very difficult to work with!

 Since the leather I chose was far too thick to be friendly, I ended up having to skive the flesh side of the leather with my X-acto knife in order to get it to be more supple and also to fit easily in and out of the belt channels.
Fun, fun, fun.

 This is after skivving extra flesh off of the back side of the leather. It still didn't play nice. I ended up wetting the leather and clamping it down where I wanted to train it to bend back over itself. This helped immensely.
This is a very messy process. Not friendly to carpets, that's for sure.
Dying the Leather:
 Upon the recommendation of the Tandy Leather saleswoman, I taped the flesh side (the back) of the leather with painter's tape before dying so my white tunic would not be at risk for getting stained by the dye when I wear the costume. It had the added benefit of making the back look nice! I left the parts that would wrap around exposed so I could stain those.
Unfortunately, the flesh side of leather absorbs dye much darker than the skin side does. For this reason I actually ended up painting it over with some watered down light brown acrylic paint to balance out the color.
 To stain the leather I used the Antique Dye and a soft rag to apply it in circles around the belt. The tricky part was the edges which I had to used a small paint brush in order to apply the dye. This sometimes resulted in extra dye getting on to the front of the belt which didn't wipe off, resulting in more dye being needed to mask those messups. It took some work but eventually I was happy with the coat. After the dye is applied you can use a cloth to wipe off the excess in uneven ways to weather the belt.

Attaching the Hardware:

After I attached the 3/4 inch and 1 inch buckles, I used contact cement and clamps to hold the leather together before I handsewed the Xs with the twine.
The Finished Product:


No comments:
Post a Comment